
Garage Door opener Installation
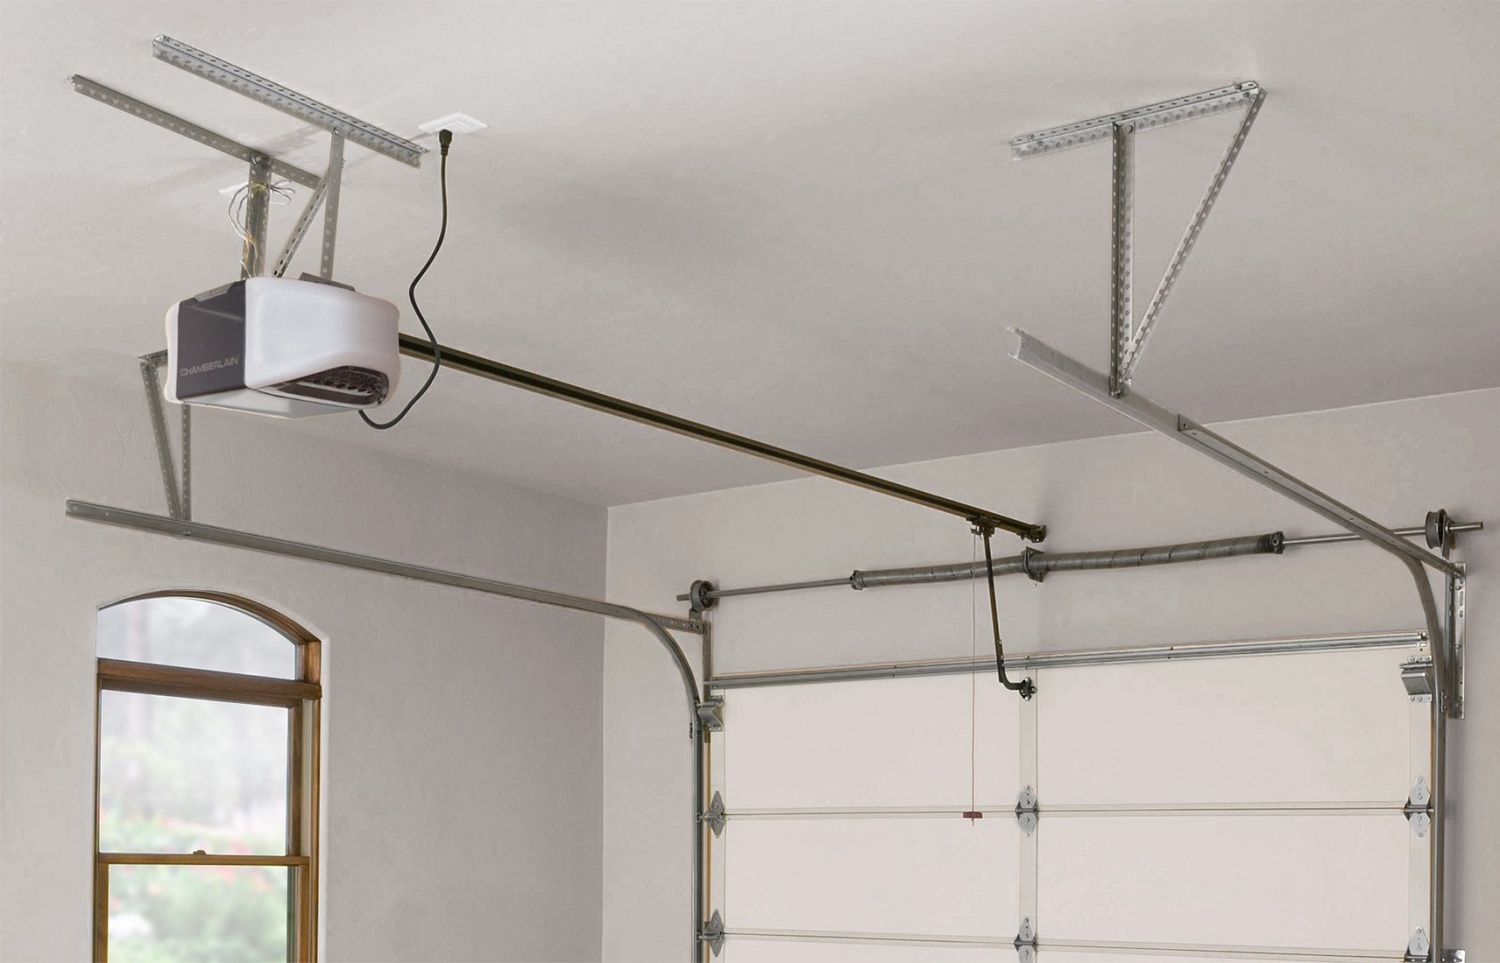
The core of any garage door framework is its opener. Not entirely obvious, garage door openers are very unpredictable bits of hardware, frequently containing many multifaceted parts that work all the while with each other to reliably raise and lower your door. Given beneath are the means for introducing a garage door opener. This is surely your answer for how to install a garage door opener remote.
- Discharge the Tension
You'll have to discharge the strain in the torsion spring before you start chipping away at the garage door. Begin by clipping flexible locking forceps onto the torsion spring shaft and wedging the pincers against the header divider over the door. Supplement a steel pole into one of the openings in the spring winding cone, which has four gaps utilized for extricating and fixing. Hold firmly to the bar, and extricate the setscrews holding the twisting cone set up. Utilize the steel poles to extricate the spring one-quarter turn at once. Interchange the two bars, utilizing one to hold the cone enduring and the other to turn the cone after the main bar is expelled.
- Detach the Existing Opener and Door
Start expelling the door boards. Begin to install chamberlain garage door opener at the top board, and expel the pivots associated with the board beneath. Be cautious when managing glass. Detach the track by unscrewing or unbolting it from the door jamb. In case you're intending to supplant your programmed door opener, expel the opener's track from above and evacuate the opener.
- Introduce the Door Panels
In case you're introducing a two-vehicle garage door, place a fortifying bar on the top board to keep the door from bowing in the middle. Make sure the bar is fixated on the board. Drill pilot openings, and secure the bar with screws. Append pivots to the highest point of each board. Numerous new doors accompany pilot openings bored by the maker.
Spot the baseboard into the door opening in best garage door opener. Hold the board upstanding by driving a nail into the divider alongside the board and twisting it over to hold the board set up. Ensure its dimension before connecting the following board. Join the following board over the first. Ensure the furrow of the upper board lays on the edge of the lower board. Rehash the procedure until every one of the boards is set up. The last board ought to broaden 1" or so past the highest point of the door opening.
- Secure the Hinges and Install the Track
From inside the garage, secure the top portion of each pivot to the board above. Spot the wheeled axles into the side pivots and the top and base hub underpins. In the wake of appending the sections, place them against the divider, and ensure the wheels lie legitimately in the track. Connect the door link to the snare on the baseboard pivot support before joining the base section to the divider. From inside the garage, secure the top portion of each pivot to the board above.
- Join the Spring Assembly to the Track
Collect the pieces to help the spring get together, and connect them to the track. Check the guidance manual to ensure you're introducing the get together in the right spot. Rest the bent segment of the track on the vertical piece, and join the opposite end to the roof section. Utilize a similar roof underpins that was utilized with the old door.
- Jolt the Tracks Together – Basic step in how to install a craftsman garage door opener
Connect the level track to the vertical track on the door. Try not to fix the jolts immovably until you're certain the door fits appropriately and lines up easily. Drill an opening through the even track to agree with the vertical track. Utilize the gaps in the vertical track to figure out where to penetrate the gap. Jolt the tracks together. Make sure to utilize the right size jolt: if the head is too enormous, it will deter the track.
- Introduce the springs
Connect the spring grapples to the springs, and after that append the spring locking cone. Jolt the two springs safely to the principal header section. Find the focal point of the opening, and imprint it on the door header. You will join the help for the spring there later. Join the spring stays to the springs, and afterward append the spring locking cone. The locking cone must be on safely: it shields the spring from popping free under high strain. Jolt the two springs safely to the fundamental header section.
- Introduce the Torsion Rod and Pulleys
Slide the torsion pole into the gaps in the side header sections. Ensure the pole is secure, and afterward join the pulleys to each finish of the bar. Secure the inside header section to the middle imprint on the header. You'll most likely need to lift the focal point of the get together to get it level before joining it.
- Append the Cable
Bring the link up from beneath, and connect it to the pulley wheel in best garage door opener on the two sides. Turn the wheel so the slack is pulled tight over the pulley from the door side. Slide the wheel to the header section, and fix it safely. Fix a couple of locking pincers to the pole outwardly of the section. This will keep the bar from turning when you start to fix the springs.
- Fix the springs
Snap a chalk line over the springs. This will enable you to realize how frequently you've turned the springs when you start fixing. Utilize the steel bars to fix the spring by turning around the slackening methodology you utilized on the old door. Check your proprietor's manual to decide what number of turns is required to fix the spring. Take a gander at the chalk line to affirm what number of turns you've made. When you achieve the proper pressure, fix the jolts in the stay to secure it, and expel the pincers from the torsion pole.
Also check : Best Belt Drive Garage Door Opener
To what extent it takes to introduce a garage door opener?
This relies upon a couple of components; however, you should depend on, at any rate, a large portion of multi-day, or about 4– 6 hours. It's one of those employments that take significantly longer to do the first run through in light of the fact that you need to get comfortable with every one of the parts and idiosyncrasies of the particular model of the opener. In the event that you happen to introduce more than one opener, the second one may take you about a fraction of the time than the first. The half-day time gauge expects that you have an appropriate electrical outlet introduced in the roof of your garage. Most openers need a grounded outlet inside two or three feet of the engine unit, and you can't interface the opener utilizing an additional rope.
Making the Job Faster

One of the greatest variables deciding to what extent it takes to introduce a garage door opener is whether you're supplanting an old opener or introducing another unit where there is no current opener. In case you're supplanting an old opener with a comparable kind of new opener, you can almost certainly reuse the current backings that hold the engine unit just as the wood obstructing for the section over the door. Nonetheless, don't endeavor to spare time by reusing electrical segments, for example, the security sensor "eyes" or any wiring. The new gadgets are probably going to be more viable than the old gadgets, and they're intended for use with the new opener. Old wiring may have worn, harmed, or weak protection and ought to be supplanted.
The Basic Steps
Here are the essential strides for introducing a standard chain-drive opener (different kinds of drives are comparative), to give you a feeling of what's included:
- Take stock - Although the greater part of us overlook the gathering directions when they instruct us to glance through and sort every one of the parts before get together, it's a smart thought to do as such for this situation.
- Assemble the rail - Rails come in five or six sorts that space out; get together more often than excludes the trolley that associates with the door and moves along the rail.
- Fasten the rail to the engine unit.
- Install the chain, including the idler pulley on the door end of the track - The chain is just somewhat longer than the rail; it's not ceaseless, similar to a bike chain. A link finishes the chain circle and disregards the idler pulley on its way back to the engine unit.
- Install the header section support - This is a 2x4 or bigger bit of wood that stays to the confining over the door and supports the door end of the track.
- Hang the opener - The engine unit mounts to the garage roof with at least two bits of edge iron. The rail mounts to the header section support by means of the header section.
- Install the door section and arm - The arm is the L-molded metal bar that appends the way to the trolley on the rail.
- Add the hardware, including the door catch and wellbeing sensor "eyes." The wiring is low-voltage and can just be stapled to the dividers and roof of the garage.
- Program the opener for legitimate door travel.
- Test the opener's security frameworks.
Also Check : Best Genie Garage Door Opener
Tips for Installing a New Garage Door Opener
A couple of traps can make the activity simpler and may marginally decrease the time it takes to introduce your garage door opener:
- Make beyond any doubt the door is adjusted before introducing the opener.
- An appropriately adjusted door will bolster itself and won't move on the off chance that you open it about midway and let go.
- A door that is out of parity is challenging for the opener and can be risky. Have your door adjusted by a genius if fundamental.
- If you're supplanting a current unit, abandon it set up until you're prepared to mount the new opener.
- It will prove to be useful as a visual reference for how everything fits together.
- Set the engine unit on a tall stepladder when it's a great opportunity to mount the unit to the roof.
- Add squares to the stepping stool as required, so the engine is in the ideal position, at that point measure for the edge iron backings.
Frequently Asked Questions
What is the average cost to install a garage door opener?
The normal expense to introduce a carport entryway opener is $340 with most mortgage holders paying somewhere in the range of $220 and $495. They kind of opener you introduce will affect your task cost. Carport openers themselves commonly run between $150 to $300, with chain-driven openers estimated on the lower end and belt-driven on the higher end. The establishment of a carport entryway opener, while not troublesome, can take some time as it requires both carpentry and electrical abilities. In the event that you feel great doing this without anyone's help, this is the place you can spare a minimal expenditure, notwithstanding, enlisting an accomplished proficient is certifiably not an enormously costly establishment and will take a master extensively less time in the event that you have not done this kind of undertaking as of now. What you spare in cash might be lost in time, thus usually worth contracting a master to do the introduction for you.
On the off chance that you need to DIY this procedure, you can hope to spend about $210. You ought to likewise look at guarantees of each carport entryway opener. Each model will have an alternate sort of guarantee, and it probably won't be legitimate should you DIY introduce the piece. Any fixes or establishment won't be secured by the guarantee. Most models will, in general, last around 10 years, so remember that when contrasting sorts too. You're frequently happier approaching an expert for their proposal and giving them a chance to introduce the opener.
Can you install a garage door opener yourself?
Having settled on the choice to buy another entryway opener framework, you have to choose the amount you can stand to spend on it. When you are working out your spending limit to buy another electric carport entryway opener, make sure to incorporate the expense of introducing it. On the off chance that you can't manage the cost of this extra cost, don't stress; for the individuals who like a touch of hands-on DIY, introducing an overhead entryway opener is simple. Keep in mind you will require extra materials for the DIY work, as:
- Screwdriver
- Mallet
- Customizable wrench
- Attachment wrench
- Measuring tape
- Drill driver
- Wire stripper
- Level
- Stepping stool
In any case, there are a few things you should remember. To start with, and above all, your carport entryway ought to be ideally utilitarian upon its underlying establishment. Besides finding an astounding carport entryway opener, the most ideal approach to guarantee this is to clean and oil the pivots and interior apparatuses of the carport entryway opener's motor to guarantee that they can stream easily through their full scope of movement. This will likewise keep clamor levels down.
How long does it take to install a garage door opener?
To what extent it takes to introduce a carport entryway opener relies upon a couple of elements, yet you should rely on at any rate a large portion of multi-day or about 4– 6 hours. It's one of those occupations that take much longer to do the first run through on the grounds that you need to get comfortable with every one of the parts and characteristics of the particular model of the opener. On the off chance that you happen to introduce more than one opener, the second one may take you about a fraction of the time than the first. The half-day time gauge accepts that you have an appropriate electrical outlet introduced in the roof of your carport. Most openers need a grounded outlet inside two or three feet of the engine unit, and you can't interface the opener utilizing an electrical line.
Is installing a garage door difficult? How to replace the garage door?
To what extent it takes to introduce a carport entryway opener relies upon a couple of elements, yet you should rely on at any rate a large portion of multi-day or about 4– 6 hours. It's one of those occupations that take much longer to do the first run through on the grounds that you need to get comfortable with every one of the parts and characteristics of the particular model of the opener. On the off chance that you happen to introduce more than one opener, the second one may take you about a fraction of the time than the first. The half-day time gauge accepts that you have an appropriate electrical outlet introduced in the roof of your carport. Most openers need a grounded outlet inside two or three feet of the engine unit, and you can't interface the opener utilizing an electrical line.
Introducing a carport entryway isn't as straightforward as introducing an ordinary entryway. Not exclusively would it be able to be troublesome yet it can likewise be perilous. Introducing a manual entryway is a lot simpler than introducing a programmed one on the grounds that a manual one is so a lot lighter and doesn't require an engine or links. However, on the off chance that you locate a strong wood entryway or another substantial one that you truly love, it must be programmed.
FINAL VERDICT
In the event that you pursue these tips just as the guidelines for the garage door opener you pick, at that point you'll without a doubt end up with inconvenience free activity. The establishment can once in a while be tedious, yet it's definitely justified even despite your while to ensure that you hit the nail on the head.
Try not to be reluctant to bring in an expert for certain part substitutions or if there is an issue you can't make sense of. It's in every case better to pay somewhat more than to chance damage. Likewise, adhere to your directions as determined so you can take advantage of your garage door opener.